Product Picks

9D Cat Eye Nails Are Taking Over—Here’s How to Try the Trend With Makartt

Product Picks

9D Cat Eye Nails Are Taking Over—Here’s How to Try the Trend With Makartt

by Customer Service on Jun 19 2025
There’s something hypnotic about cat eye nails. The rich shimmer, the dimensional glow, the shifting light—this nail trend has been captivating beauty lovers for years. And now, it’s getting an upgrade with 9D technology that makes the look deeper, bolder, and more magnetic than ever. Enter: the Makartt 9D Magnetic Cat Eye Gel Nail Polish Set—a 6-color kit that delivers salon-level cat eye effects at home. Whether you're new to the trend or just upgrading your nail art arsenal, this set is your shortcut to a seriously magical manicure. What Are 9D Cat Eye Nails? Cat eye nails start with a special magnetic polish that contains fine metal particles. When exposed to a magnet, the particles shift and align, creating a reflective band across the nail—mimicking a cat’s glowing iris. Why Choose Makartt’s 9D Magnetic Gel Polish Set? If you’ve ever tried cat eye nails, you’ll appreciate how easy—and stunning—Makartt makes the process. This DIY-friendly kit includes: Six Stunning ColorsEach 8ml bottle delivers vibrant color and rich metallic depth: Yellow Gold Deep Purple Silver Gray Rose Red Emerald Green Black Hole Effect (a dark, swirling multidimensional shade) Included Magnet StickNo extra tools needed! Use the dual-ended magnet to create stripes, swirls, or halo designs. Salon-Grade Quality at HomeMakartt polishes are soak-off, long-lasting, and compatible with all UV/LED lamps. How to Apply 9D Magnetic Gel Polish Prep Your NailsClean, buff, and shape your nails. Apply a base coat and cure under UV/LED light. Optional: Apply Black Base GelA black layer underneath intensifies the cat eye effect. Apply First Layer of Makartt Gel PolishCure under lamp. Apply Second Layer—Don't Cure YetHold the magnet stick over the wet polish for 5–10 seconds to form the 9D pattern. Cure + Top CoatOnce the design appears, cure again and seal with a top coat. 4 Gorgeous 9D Cat Eye Designs to Try Black Hole SwirlUse the Black Hole Effect polish with a spiral magnet move—space vibes guaranteed. Galaxy FadeBlend Silver and Purple with soft strokes for a galaxy look. Golden StripeA single dramatic shimmer line using Yellow Gold—clean and luxe. Rose Glow French TipApply Rose Red on tips over nude nails for a modern cat eye French. Where to Shop the Look You can find the full set on Makartt—and it’s currently one of Makartt’s best-selling magnetic polish kits. If you’re looking to level up your nail game or try out 9D cat eye nails for the first time, this is your go-to. 📎 Also check out Makartt's Nail Blog for more DIY nail tips and tutorials. The 9D cat eye nail trend brings a new level of dimension and magic to your manicure. With Makartt’s expertly curated 6-color set, you get the power of professional-grade magnetic polish at your fingertips—literally. Whether you’re going for mysterious, playful, or cosmic, there’s a shade and design waiting for you. So go ahead—let your nails glow from every angle.
Unlock Flawless Nail Art with Makartt Rhinestone Glue Gel

Product Picks

Unlock Flawless Nail Art with Makartt Rhinestone Glue Gel

by Customer Service on Jun 05 2025
💅 Why Choose Makartt Rhinestone Glue Gel? Looking for a reliable way to keep rhinestones and crystals firmly in place on your nails? The Makartt Rhinestone Glue Gel is specially formulated to give your nail art that professional, long-lasting finish. Unlike ordinary nail glue, this gel: *Offers maximum adhesion for rhinestones, crystals, charms, and studs*Comes with a dual-ended brush & picker pen for easy application*Cures under UV/LED lamps, ensuring a strong bond with zero mess*Has a clear, glossy finish that won’t dull your stones This makes it the go-to choice for DIY nail lovers and professional nail techs alike. 🛠 How to Use It for Best Results 1.Prep Your Nails: Clean and shape your nails, apply base coat, and cure.2.Apply Gel: Use the brush to apply a small amount of Makartt glue gel on the nail where the rhinestone will go.3.Place the Rhinestones: Use the built-in picker to set your stones or crystals onto the gel.4.Cure: Place your nails under a UV/LED lamp for 60–120 seconds.5.Seal (Optional): Apply a top coat around the stones (avoid covering the top) and cure again for extra durability. 💡 Pro Tip: For larger crystals, apply a second layer of glue gel underneath the charm for added grip. 🎨 Design Ideas with Makartt Rhinestone GlueWant inspiration? Try these trendy nail looks: *Minimalist single-stone nails for everyday elegance*Full glam gem clusters for special occasions*Negative space designs with strategic rhinestone placements Makartt Rhinestone Glue Gel isn’t just a product—it’s the secret to unlocking long-lasting, glamorous nail art. Whether you're new to DIY nails or a seasoned pro, this adhesive will elevate your nail game.
Soft Gel Nail Tips: The Ideal Choice for Nail Extensions!

Product Picks

Soft Gel Nail Tips: The Ideal Choice for Nail Extensions!

by Customer Service on May 30 2025
you tired of spending hours at the nail salon, only to have your nails chip or break within days? Look no further than Makartt Soft Gel Nail Tips! These innovative soft gel nail tips are designed to give you the perfect almond-shaped nails that are both durable and beautiful. Whether you're a professional nail technician or a DIY enthusiast, Makartt Soft Gel Nail Tips are the ultimate solution for achieving salon-quality nails at home. What are Soft Gel Nail Tips? Makartt Soft Gel Nail Tips are full cover, pre-buffed nail tips made from high-quality soft gel material. They come in a pack of 500 pieces, with 10 different sizes to ensure a perfect fit for every nail. These soft gel nail tips are designed to be soaked off easily, making them convenient for both application and removal. With their clear, natural finish, they can be used as a base for any nail design or worn on their own for a classic, elegant look. Why Choose Makartt Soft Gel Nail Tips? There are several reasons why Makartt Soft Gel Nail Tips are the top choice for nail enthusiasts: Long Lasting: Made from high-quality soft gel material, these soft gel nail tips are strong and long-lasting, ensuring that your manicure stays intact for weeks. Perfect Shape: The almond shape is known for its flattering and elongating effect on the fingers. With Makartt Nail Glue for soft gel nail tips, you can achieve this trendy shape effortlessly. Easy Application: The pre-buffed surface of these soft gel nail tips makes them easy to apply, even for beginners. Simply glue them onto your natural nails and file them to your desired length and shape. Customizable: Makartt Soft Gel Nail Tips can be trimmed, filed, and painted to create endless nail designs. Whether you prefer a simple nude look or intricate nail art, these soft gel nail tips are the perfect canvas. Advantages of Soft Gel Nail Tips Durability: Soft gel nail tips are known for their long-lasting properties. Unlike traditional nail tips, soft gel nail tips are flexible yet strong, reducing the risk of chipping or breaking. Easy Removal: One of the key benefits of soft gel nail tips is their ease of removal. Soak-off soft gel nail tips can be removed without causing damage to your natural nails, making the process gentle and stress-free. Natural Appearance: The clear, natural finish of soft gel nail tips ensures that your nails look as natural as possible. This feature is especially beneficial for those who prefer a subtle and understated nail look. Versatility: Soft gel nail tips can be used in various ways, from creating a classic French manicure to experimenting with bold colors and intricate designs. Their versatility makes them a favorite among both professional nail technicians and DIY enthusiasts. How to Apply Soft Gel Nail Tips Using soft gel nail tips is a breeze. Here's a step-by-step guide to achieving salon-worthy nails: Start by preparing your natural nails. Remove any old polish and gently push back your cuticles. Select the appropriate size of Makartt Soft Gel Nail Tip for each of your nails. Apply a small amount of nail glue to the back of the soft gel nail tip and press it onto your natural nail, starting from the cuticle and working your way to the tip. Hold the soft gel nail tip in place for a few seconds to allow the glue to dry and bond. Once all the soft gel nail tips are applied, use a nail file to shape and smooth the edges. You can also trim them to your desired length. Get Your Makartt Soft Gel Nail Tips Today! Ready to take your nail game to the next level? Don't miss out on the opportunity to own Makartt Soft Gel Nail Tips. With their superior quality and versatility, these soft gel nail tips are a must-have for any nail enthusiast. Say goodbye to expensive salon visits and hello to beautiful, long-lasting nails from the comfort of your own home. Click here to purchase your very own Makartt Soft Gel Nail Tips Set and start enjoying beautiful nails that last! For more nail shapes and false nail sets, click HERE to check out the details. By incorporating soft gel nail tips into your nail care routine, you'll enjoy the benefits of durable and stylish nails without the hassle of frequent salon visits. The high-quality soft gel material ensures that your nails remain strong and beautiful for weeks, while the customizable nature of these tips allows you to experiment with various designs and styles. Makartt Soft Gel Nail Tips are not only practical but also aesthetically pleasing. The almond shape of these tips adds an elegant touch to your nails, making your fingers look longer and more slender. Whether you prefer a minimalist nude look or bold, intricate nail art, these soft gel nail tips provide the perfect canvas for your creativity. In conclusion, Makartt Soft Gel Nail Tips are the ideal choice for anyone looking to achieve salon-quality nails at home. Their high-quality soft gel material, ease of application, and customizable nature make them a standout product in the world of nail care. By choosing Makartt Soft Gel Nail Tips, you'll enjoy long-lasting, beautiful nails that are sure to turn heads. Don't wait any longer to elevate your nail game. Purchase your Makartt Soft Gel Nail Tips today and experience the difference for yourself. Say goodbye to the hassle of frequent salon visits and hello to stunning, durable nails that you can achieve from the comfort of your own home! For more special deal and sale, click Makartt Amazon Store to check out the details!
Say Goodbye to Nail Hassles: Why the Makartt Nail Remover Kit is Essential

Product Picks

Say Goodbye to Nail Hassles: Why the Makartt Nail Remover Kit is Essential

by Customer Service on May 26 2025
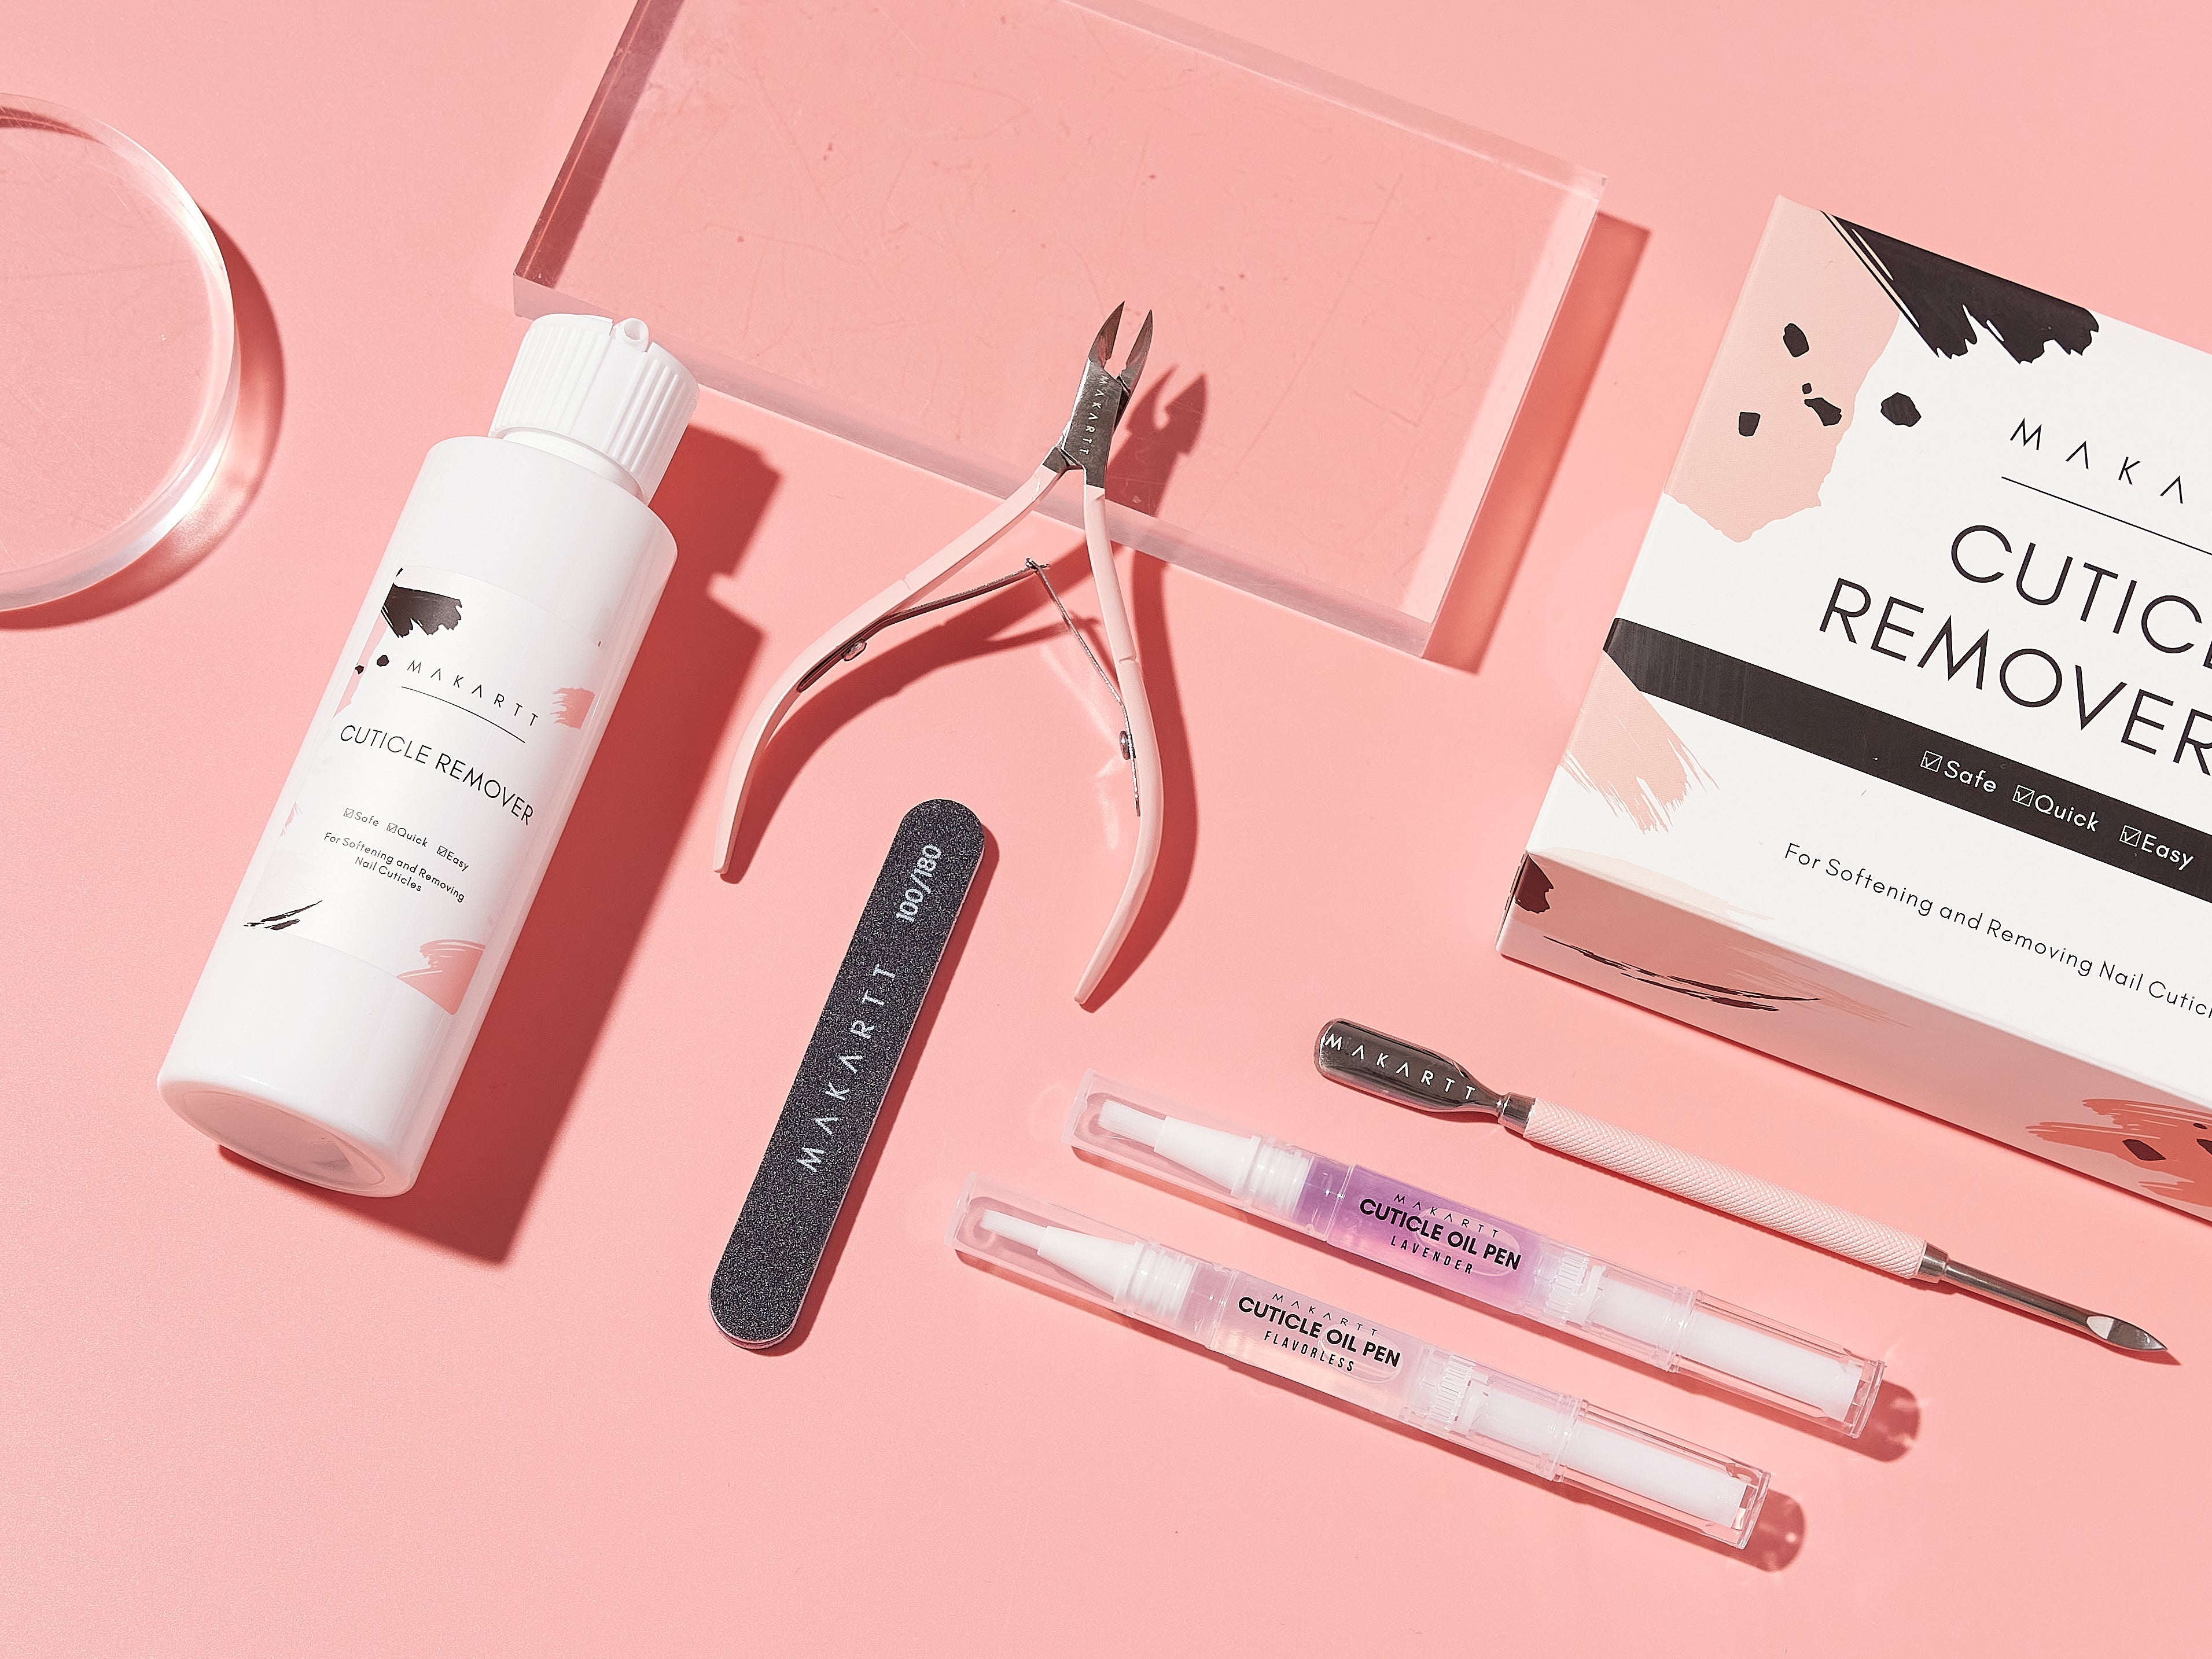
Say Goodbye to Stubborn Glue with Solid Nail Glue Remover: A Step-by-Step Guide If you’re a fan of press-on nails, nail tips nail designs, you’ve probably encountered the challenge of removing solid nail glue without damaging your natural nails. For those who frequently use solid nail glue, finding a product that makes removal safe, easy, and efficient can feel like a game changer. Enter the Makartt Solid Nail Glue Remover—a product specifically designed to tackle stubborn glue and make the removal process smoother than ever. In this blog post, we will provide a step-by-step guide on how to use the Makartt Solid Nail Glue Remover, explore its key benefits, and share why it’s an essential addition to your nail care routine. Why Solid Nail Glue Remover Is Important Removing solid nail glue can be a tricky process. If done improperly, it can damage your natural nails, causing them to become weak and brittle. Many people use harsh methods such as excessive scraping, soaking in acetone for too long, or peeling the glue off, which can harm the nail bed. The Makartt Solid Nail Glue Remover is formulated to gently dissolve the glue without damaging the nails, providing a safer and more effective solution. This product is especially useful for people who regularly use nail extensions or press-on nails and want to maintain healthy natural nails. Get your Makartt Nail Glue Remover here. Key Benefits of Makartt Solid Nail Glue Remover Before diving into the step-by-step guide, let’s take a look at why this product stands out and why it’s a must-have in your nail care kit: Gentle on Natural NailsOne of the standout features of the Makartt Solid Nail Glue Remover is its gentle formula. Unlike acetone, which can dry out and weaken your nails, this product focuses on softening the glue, making it easier to remove without causing damage. Time-Saving and EfficientRemoving glue can often feel like a time-consuming process, but the Makartt remover is designed to speed things up. It works efficiently to break down even the most stubborn glue, reducing the time you spend on nail removal. Versatile UsageThis remover works on different types of nail glues, including those used for press-ons, acrylics, and even dip powders. Whether you're a DIY nail enthusiast or a professional nail tech, this product caters to all needs. No Harsh Scraping NeededThe Makartt Nail Glue Remover makes the process of removing glue smooth and hassle-free, meaning you don’t have to use aggressive scraping techniques that could damage your natural nails. Affordable and AccessibleAvailable on Amazon at a great price, this product offers excellent value for those who frequently use nail glue. It's an affordable solution that delivers salon-quality results at home. Step-by-Step Guide to Using Makartt Solid Nail Glue Remover Now that we know why this product is so beneficial, let’s dive into the step-by-step process of using the Makartt Solid Nail Glue Remover to safely and effectively remove glue from your nails. Step 1: Gather Your Tools Before you begin, make sure you have all the necessary tools at hand: Makartt Solid Nail Glue RemoverBuy it here Cotton pads or cotton ballsThese will be used to apply the remover to your nails. Cuticle pusher or orange wood stickThis tool will help gently lift off any softened glue or residue. Nail file or bufferTo smooth the surface of your nails once the glue is removed. Acetone or warm waterDepending on your preference, you can use acetone to speed up the glue-dissolving process or opt for warm water for a gentler approach. Cuticle oil and hand lotionFor rehydrating your nails and cuticles after the removal process. Step 2: Prep Your Nails Start by lightly filing the top layer of the nail glue or artificial nail. This step helps break the surface of the glue, allowing the remover to penetrate more easily. Be careful not to file too aggressively, as this can damage your natural nail. Step 3: Apply the Makartt Nail Glue Remover Saturate a cotton pad or cotton ball with the Makartt Solid Nail Glue Remover. Place the saturated cotton on the nail and secure it with a reusable nail clip or small piece of foil to hold it in place. This step ensures that the remover stays in contact with the glue, allowing it to dissolve effectively. Let the remover sit on your nails for about 10-15 minutes. If you’re using press-on nails, you may want to check after 10 minutes to see if the glue has loosened enough to remove. Step 4: Gently Remove the Glue After the soaking time, gently use a cuticle pusher or orange wood stick to push off the softened glue or nail extension. You should not need to apply much pressure—if the glue does not come off easily, reapply the remover and let it sit for another 5 minutes. It’s important to avoid peeling the glue off forcefully, as this can cause your natural nails to peel or weaken. Step 5: Buff and Smooth Once the glue has been removed, use a nail buffer or nail file to smooth out the surface of your nails. This step removes any remaining residue and helps restore the smoothness of your natural nails. Step 6: Rehydrate Your Nails After the removal process, your nails and cuticles may feel a little dry. Apply a generous amount of cuticle oil to rehydrate your nails, followed by a nourishing hand lotion. This will help keep your nails strong and prevent them from becoming brittle after the removal process. Tips for Using the Makartt Solid Nail Glue Remover Effectively Be PatientWhile it may be tempting to rush through the process, giving the remover enough time to break down the glue is key to preventing damage. If the glue isn’t coming off easily, soak your nails for a bit longer rather than forcing it off. Use Gentle ToolsAvoid using sharp or metal tools that can scratch the surface of your nails. Stick with wooden sticks or soft cuticle pushers for safe removal. Moisturize After RemovalAlways follow up the removal process with cuticle oil and moisturizer to restore hydration to your nails and prevent brittleness. What Users Are Saying About Makartt Solid Nail Glue Remover Here’s what customers have to say about the Makartt Solid Nail Glue Remover: "I’ve been doing my own nails at home for years, and this remover is a game changer. It takes off the glue without any damage to my natural nails, and it’s so much faster than my old methods."— Jessica, DIY Nail Enthusiast "I use press-on nails all the time, and I’ve always struggled to get the glue off afterward. This Makartt remover made the process so much easier. I didn’t have to spend hours soaking my nails in acetone anymore."— Emma, At-Home Manicure Lover "This remover has been a lifesaver for my salon. We use a lot of different types of glue for nails, and this remover works for all of them. Our clients are always happy with how gentle and fast it is."— Sarah, Professional Nail Technician Conclusion: Is Makartt Solid Nail Glue Remover Worth It? If you regularly use press-on nails, acrylics, or any form of solid nail glue, the Makartt Solid Nail Glue Remover is a must-have product for safe and effective nail removal. It saves time, prevents damage to your natural nails, and provides a professional-grade solution at an affordable price. Say goodbye to the days of scraping, peeling, and damaging your nails—get your hands on the Makartt Nail Glue Remover today, and experience how easy nail removal can be! Purchase Makartt Solid Nail Glue Remover here.
Celebrate Mother's Day with Stunning Nail Designs

Product Picks

Celebrate Mother's Day with Stunning Nail Designs

by Customer Service on May 09 2025
Have you ever thought about getting Mother’s Day nails done? If you and your mom are besties, you can get your nails done with any of the sweet mother’s day nail art ideas below. Or, treat your mom to a set inspired by the ideas below. Better yet, if you’re a mom yourself, why not treat yourself to a cute set of nails to celebrate yourself. I mean why not? Being a mom is tough and you need that self-love, honey! Why Mother’s Day Nails Make the Perfect GiftWhen it comes to thoughtful and personal gifts, few things beat a self-care moment. Mother's Day nails aren't just a trend — they’re a way to gift joy, relaxation, and beauty. Whether you’re treating your mom to a salon appointment or curating a DIY nail kit she can enjoy at home, this small gesture makes a lasting impact. Pair a gentle pastel palette with heartwarming floral accents, or go bold with glittery pinks and reds. It’s more than just a mani — it’s an experience that celebrates her. Top 5 Mother's Day Nail Design Ideas 1. Pastel Petal TipsSoft lavender, mint, and blush tones are always a spring favorite. Add dainty hand-drawn florals or use press-ons for easy application. 2. Glitter Gradient GlamSurprise her with a bit of sparkle. Try a subtle nude base with gold or rose gold glitter cascading from the tips. 3. Rose Garden RomancePink, red, and white swirl together like a blooming bouquet. Add rhinestones for an elegant touch. 4. Classic French with a TwistFrench tips never go out of style, but you can elevate them with micro-flower decals or a chrome finish. 5. DIY Nail Kit Gift SetCan’t choose just one look? Build a custom DIY gift kit so she can explore different styles herself. 6.How to Create the Perfect Mother's Day Nail Look at HomeStep 1: Start with clean, shaped nails.Step 2: Apply a base coat and cure with a UV lamp.Step 3: Choose her favorite design – floral, glitter, or classic French.Step 4: Use decals, stickers, or brushes for detailing.Step 5: Seal with a glossy top coat. Make It a MemoryWant to make it even more special? Set up a mini spa at home, light a candle, put on her favorite playlist, and turn her Mother’s Day manicure into a full-on pampering session. Also, don’t forget to take pictures. A beautiful nail moment like this deserves to be shared. Mother’s Day nails are a beautiful blend of creativity and care. Whether you’re surprising her with a personalized nail kit or a salon-style experience at home, you’re giving her something truly thoughtful. Celebrate the love, the beauty, and the bond – one nail at a time.    
Why You Need the Makartt Nail Remover Kit: The Ultimate Solution for Safe and Easy Nail Removal

Product Picks

Why You Need the Makartt Nail Remover Kit: The Ultimate Solution for Safe and Easy Nail Removal

by NailLab Makartt on Oct 15 2024
Say Goodbye to Stubborn Glue with Solid Nail Glue Remover: A Step-by-Step Guide If you’re a fan of press-on nails, nail tips nail designs, you’ve probably encountered the challenge of removing solid nail glue without damaging your natural nails. For those who frequently use solid nail glue, finding a product that makes removal safe, easy, and efficient can feel like a game changer. Enter the Makartt Solid Nail Glue Remover—a product specifically designed to tackle stubborn glue and make the removal process smoother than ever. In this blog post, we will provide a step-by-step guide on how to use the Makartt Solid Nail Glue Remover, explore its key benefits, and share why it’s an essential addition to your nail care routine. Why Solid Nail Glue Remover Is Important Removing solid nail glue can be a tricky process. If done improperly, it can damage your natural nails, causing them to become weak and brittle. Many people use harsh methods such as excessive scraping, soaking in acetone for too long, or peeling the glue off, which can harm the nail bed. The Makartt Solid Nail Glue Remover is formulated to gently dissolve the glue without damaging the nails, providing a safer and more effective solution. This product is especially useful for people who regularly use nail extensions or press-on nails and want to maintain healthy natural nails. Get your Makartt Nail Glue Remover here. Key Benefits of Makartt Solid Nail Glue Remover Before diving into the step-by-step guide, let’s take a look at why this product stands out and why it’s a must-have in your nail care kit: Gentle on Natural NailsOne of the standout features of the Makartt Solid Nail Glue Remover is its gentle formula. Unlike acetone, which can dry out and weaken your nails, this product focuses on softening the glue, making it easier to remove without causing damage. Time-Saving and EfficientRemoving glue can often feel like a time-consuming process, but the Makartt remover is designed to speed things up. It works efficiently to break down even the most stubborn glue, reducing the time you spend on nail removal. Versatile UsageThis remover works on different types of nail glues, including those used for press-ons, acrylics, and even dip powders. Whether you're a DIY nail enthusiast or a professional nail tech, this product caters to all needs. No Harsh Scraping NeededThe Makartt Nail Glue Remover makes the process of removing glue smooth and hassle-free, meaning you don’t have to use aggressive scraping techniques that could damage your natural nails. Affordable and AccessibleAvailable on Amazon at a great price, this product offers excellent value for those who frequently use nail glue. It's an affordable solution that delivers salon-quality results at home. Step-by-Step Guide to Using Makartt Solid Nail Glue Remover Now that we know why this product is so beneficial, let’s dive into the step-by-step process of using the Makartt Solid Nail Glue Remover to safely and effectively remove glue from your nails. Step 1: Gather Your Tools Before you begin, make sure you have all the necessary tools at hand: Makartt Solid Nail Glue RemoverBuy it here Cotton pads or cotton ballsThese will be used to apply the remover to your nails. Cuticle pusher or orange wood stickThis tool will help gently lift off any softened glue or residue. Nail file or bufferTo smooth the surface of your nails once the glue is removed. Acetone or warm waterDepending on your preference, you can use acetone to speed up the glue-dissolving process or opt for warm water for a gentler approach. Cuticle oil and hand lotionFor rehydrating your nails and cuticles after the removal process. Step 2: Prep Your Nails Start by lightly filing the top layer of the nail glue or artificial nail. This step helps break the surface of the glue, allowing the remover to penetrate more easily. Be careful not to file too aggressively, as this can damage your natural nail. Step 3: Apply the Makartt Nail Glue Remover Saturate a cotton pad or cotton ball with the Makartt Solid Nail Glue Remover. Place the saturated cotton on the nail and secure it with a reusable nail clip or small piece of foil to hold it in place. This step ensures that the remover stays in contact with the glue, allowing it to dissolve effectively. Let the remover sit on your nails for about 10-15 minutes. If you’re using press-on nails, you may want to check after 10 minutes to see if the glue has loosened enough to remove. Step 4: Gently Remove the Glue After the soaking time, gently use a cuticle pusher or orange wood stick to push off the softened glue or nail extension. You should not need to apply much pressure—if the glue does not come off easily, reapply the remover and let it sit for another 5 minutes. It’s important to avoid peeling the glue off forcefully, as this can cause your natural nails to peel or weaken. Step 5: Buff and Smooth Once the glue has been removed, use a nail buffer or nail file to smooth out the surface of your nails. This step removes any remaining residue and helps restore the smoothness of your natural nails. Step 6: Rehydrate Your Nails After the removal process, your nails and cuticles may feel a little dry. Apply a generous amount of cuticle oil to rehydrate your nails, followed by a nourishing hand lotion. This will help keep your nails strong and prevent them from becoming brittle after the removal process. Tips for Using the Makartt Solid Nail Glue Remover Effectively Be PatientWhile it may be tempting to rush through the process, giving the remover enough time to break down the glue is key to preventing damage. If the glue isn’t coming off easily, soak your nails for a bit longer rather than forcing it off. Use Gentle ToolsAvoid using sharp or metal tools that can scratch the surface of your nails. Stick with wooden sticks or soft cuticle pushers for safe removal. Moisturize After RemovalAlways follow up the removal process with cuticle oil and moisturizer to restore hydration to your nails and prevent brittleness. What Users Are Saying About Makartt Solid Nail Glue Remover Here’s what customers have to say about the Makartt Solid Nail Glue Remover: "I’ve been doing my own nails at home for years, and this remover is a game changer. It takes off the glue without any damage to my natural nails, and it’s so much faster than my old methods."— Jessica, DIY Nail Enthusiast "I use press-on nails all the time, and I’ve always struggled to get the glue off afterward. This Makartt remover made the process so much easier. I didn’t have to spend hours soaking my nails in acetone anymore."— Emma, At-Home Manicure Lover "This remover has been a lifesaver for my salon. We use a lot of different types of glue for nails, and this remover works for all of them. Our clients are always happy with how gentle and fast it is."— Sarah, Professional Nail Technician Conclusion: Is Makartt Solid Nail Glue Remover Worth It? If you regularly use press-on nails, acrylics, or any form of solid nail glue, the Makartt Solid Nail Glue Remover is a must-have product for safe and effective nail removal. It saves time, prevents damage to your natural nails, and provides a professional-grade solution at an affordable price. Say goodbye to the days of scraping, peeling, and damaging your nails—get your hands on the Makartt Nail Glue Remover today, and experience how easy nail removal can be! Purchase Makartt Solid Nail Glue Remover here.
Fall Nail Ideas

Product Picks

Fall Nail Ideas: Elevate Your Look with 3D Sculpture Gel and Rhinestone Glue for Stunning Autumn Vibes

by NailLab Makartt on Oct 14 2024
As the leaves begin to change and the air turns crisp, it’s the perfect time to refresh your nail game with creative, seasonally inspired designs. Fall nail trends are all about blending earthy tones, rich hues, and eye-catching details that mirror the beauty of autumn. If you’re looking to take your fall manicure to the next level, incorporating 3D sculpture gel and rhinestone glue will add dimension and sparkle to your nails, making them stand out in any setting. In this guide, we’ll show you how to create stunning autumn nail art using these tools. 1. Start with a Seasonal Color Palette The foundation of any great fall nail design is a color palette that captures the essence of autumn. Think warm shades like burnt orange, deep burgundy, olive green, and golden browns. These colors provide a rich canvas for the 3D accents and rhinestone embellishments to shine. 2. Create Dimension with 3D Sculpture Gel One of the most exciting ways to elevate your fall nail look is by using 3D sculpture gel. This versatile product allows you to sculpt intricate designs, from delicate fall leaves to tiny pumpkins, directly onto your nails. Here’s how to do it: Step 1: Start with a base coat and apply your fall-colored polish. Step 2: Using the 3D sculpture gel and a small nail brush, gently sculpt your chosen design. If you’re a beginner, start with something simple like a raised leaf or swirl. Step 3: Cure the gel under a UV lamp to harden the design. The result is a textured, multi-dimensional look that gives your nails a sophisticated, custom feel. For added flair, mix in metallic accents like gold or copper to mimic the changing leaves. 3. Add Some Sparkle with Rhinestone Glue Nothing says glam like a touch of sparkle, and rhinestone glue makes it easy to apply dazzling gems to your nails. Whether you prefer a minimalist approach with just a few rhinestones or a more elaborate design, rhinestones instantly elevate your look. Here’s how to incorporate them: Step 1: After finishing your 3D sculpture design, apply small dots of rhinestone glue to the areas where you want to place the gems. Step 2: Use a tweezer to carefully position the rhinestones, pressing gently to secure them. Step 3: Once you’ve arranged the rhinestones to your liking, cure your nails under a UV lamp to ensure the gems stay in place. You can scatter rhinestones across your nails for a subtle sparkle or create a statement accent nail with more intricate patterns. 4. Lock in Your Design with a 3-in-1 Top Coat To ensure your fall nail art lasts throughout the season, a 3-in-1 top coat is essential. This product not only adds shine but also strengthens your nails and protects your design from chipping. Look for a top coat that offers long-lasting durability and a glossy finish to keep your 3D sculpture gel and rhinestones looking fresh. Step 1: Apply a thin layer of the 3-in-1 top coat over your entire nail, including the 3D elements and rhinestones. Step 2: Cure the top coat under a UV lamp to seal everything in place. This step is crucial for maintaining the integrity of your fall nail design and keeping your manicure chip-free for weeks. 5. Easy Removal with Nail Glue Remover While 3D designs and rhinestones make your nails look stunning, removal can be tricky if you’re not using the right products. Nail glue remover is specially formulated to safely dissolve the adhesive without damaging your natural nails. Here’s how to use it: Step 1: Soak a cotton pad in nail glue remover and place it on your nails. Step 2: Wrap each finger with aluminum foil and let it sit for about 10-15 minutes. Step 3: Gently remove the foil and cotton pads. Use a cuticle pusher to lift off any remaining rhinestones or 3D gel. By using nail glue remover, you can protect your nails while easily transitioning to your next fall-inspired manicure. Important Tips and Precautions When Using 3D Sculpture Gel and Rhinestone Glue Although 3D sculpture gel and rhinestone glue can add creativity and elegance to your nail designs, there are a few key tips and precautions to keep in mind to ensure the best results and long-lasting wear. 1. Make Sure the Nail Surface is Clean and Smooth Before using 3D sculpture gel or applying rhinestones, ensure that your nail surface is properly prepped. Clean your nails thoroughly with alcohol or a nail prep solution to remove oils and dirt. A clean surface will help both the gel and glue adhere better, giving you longer-lasting results. 2. Don’t Overuse Glue When using rhinestone glue, less is often more. Using too much glue can make the application messy and cause the rhinestones to slide out of place. Apply a small dot of glue to the desired area, place the rhinestone, and cure it quickly under the UV lamp for the best hold. Too much glue may also affect the final look of your design, making it less polished. 3. Cure in Between Layers If you’re adding multiple layers of 3D sculpture gel or lots of rhinestones, remember to cure in between each step. This will prevent the gel from becoming too thick and ensure each layer is properly hardened, giving you a more secure design that will last longer. What Others Are Saying About These Products “I absolutely love using the 3D sculpture gel! It’s so easy to work with, and I can create intricate designs that really stand out. I’ve gotten so many compliments on my fall leaves design, and the gel holds up for weeks without chipping!”— Emma, Nail Art Enthusiast “This gel changed the way I do my nails. I’m no longer limited to flat designs! I’ve used it to create everything from little pumpkins to 3D swirls for an autumn look, and the results are always amazing.”— Sarah, DIY Nail Artist “I used the rhinestone glue with flatback crystals, and the hold is incredible! I didn’t lose a single rhinestone even after two weeks. It’s perfect for adding a little sparkle to my fall nails.”— Jessica, Professional Nail Technician “The rhinestone glue works so well! I used it with the 3D gel to create a fall nail look with gold rhinestones, and the result was stunning. Plus, it was super easy to remove when I was ready for a new look.”— Kate, DIY Nail Lover Fall is the perfect time to experiment with rich colors, textured designs, and a touch of sparkle. By using 3D sculpture gel and rhinestone glue, you can create a stunning, unique nail look that captures the essence of autumn. Whether you’re sculpting delicate designs or adding rhinestones for a glamorous touch, these products help bring your fall nail ideas to life. So go ahead and embrace the autumn vibes—your nails will thank you! And with user-approved products like 3D sculpture gel and rhinestone glue, your fall manicure is sure to be a show-stopper. By adding essential tips and incorporating user reviews, this article not only provides a comprehensive guide but also encourages trust and engagement, making it a helpful and relatable resource for readers looking to up their fall nail game.
The Science Behind Cat Eye Gel Nail Polish: How It Works

Product Picks

The Science Behind Cat Eye Gel Nail Polish: How It Works

by NailLab Makartt on Jul 24 2024
Cat eye gel polish is specially formulated with metallic particles that respond to magnetic fields. When a magnet is held close to the wet gel polish, the metallic particles align in the direction of the magnetic field, creating a reflective, line-like pattern that mimics the slit eye of a cat. This effect gives the polish its name and unique appearance. The magic behind this captivating effect lies in the science of magnetism and the innovative formulation of the gel polish. In this blog, we'll delve into the science behind cat eye gel polish, explaining how it works, and highlight two top products from Makartt that exemplify this innovative technology. How Cat Eye Gel Polish Works The Role of Metallic Particles The key component in cat eye gel polish is the presence of fine metallic particles suspended within the gel. These particles are typically iron oxides or other magnetically responsive materials. When the polish is applied to the nails, these particles are dispersed evenly throughout the layer of gel. Magnetic Field Interaction To create the cat eye effect, a small, specialized magnet is used. This magnet is held close to the surface of the wet gel polish before it is cured under a UV or LED lamp. The magnetic field generated by the magnet causes the metallic particles to move and align themselves along the field lines. This alignment creates a distinctive, shimmering line or "cat eye" effect on the nail. Curing the Polish Once the desired pattern is achieved, the gel polish is cured under a UV or LED lamp. The curing process hardens the gel, locking the metallic particles in their aligned positions. This ensures that the cat eye effect remains intact until the polish is removed. Top Cat Eye Gel Polish Products from Makartt Makartt offers high-quality cat eye gel polish products that harness this fascinating technology.  Makartt Gel Polish Set – 6 Colors Magnetic Cat Eye The Makartt Gel Polish Set – 6 Colors Magnetic Cat Eye is a versatile and vibrant set that includes six stunning colors. Each polish in this set features the magnetic particles necessary to create the mesmerizing cat eye effect. The colors included are Yellow, Purple, Silver, Rose Red, Green, and 9D Black Hole, offering a wide range of options for different styles and occasions. Why You’ll Love It: Includes six vibrant colors High-quality formula for long-lasting wear Easy to use with any magnetic tool Perfect for creating a variety of nail art designs How to Use: Prepare your nails by filing, buffing, and applying a base coat. Cure under a UV/LED lamp. Apply the cat eye gel polish and hold the magnet close to the wet polish for a few seconds to create the desired effect. Cure the polish under the lamp. Apply a top coat and cure again to seal the design. Makartt Magnetic Gel Polish Set – Color Changing Chameleon The Makartt Magnetic Gel Polish Set – Color Changing Chameleon takes the cat eye effect to the next level with its color-changing properties. This set includes polishes that not only create the cat eye effect but also change color based on the light and angle, adding an extra dimension of visual interest. Why You’ll Love It: Combines cat eye and color-changing effects High-quality, durable formula Includes a variety of chameleon-like colors Perfect for dynamic, eye-catching nail art How to Use: Prepare your nails by filing, buffing, and applying a base coat. Cure under a UV/LED lamp. Apply the color-changing cat eye gel polish and hold the magnet close to the wet polish for a few seconds to create the desired effect. Cure the polish under the lamp. Apply a top coat and cure again to seal the design. Tips for Achieving the Perfect Cat Eye Effect Use a Strong Magnet: Ensure you are using a high-quality, strong magnet to get the best alignment of metallic particles. Hold the Magnet Close: Hold the magnet as close to the nail surface as possible without touching it to create a sharp, defined line. Experiment with Angles: Try different angles and positions of the magnet to create unique patterns and effects. Thin Layers: Apply thin layers of gel polish to ensure the magnet can effectively interact with the metallic particles. Seal with Top Coat: Always apply a top coat to protect your design and add a glossy finish. The science behind cat eye gel polish is a fascinating blend of chemistry and magnetism. By understanding how metallic particles and magnetic fields interact, you can create stunning, multidimensional nail art that captures the essence of a cat's eye. Makartt's range of cat eye gel polishes, including the Gel Polish Set – 6 Colors Magnetic Cat Eye and the Magnetic Gel Polish Set – Color Changing Chameleon, offers high-quality options for achieving these mesmerizing effects. Whether you’re a professional nail artist or a DIY enthusiast, these products will help you create captivating, professional-quality manicures that are sure to impress. For more information and to explore the full range of Makartt’s cat eye gel polishes, visit the Makartt Cat Eye Gel Polish Collection.
Cat Eye Gel Nail Polish

Product Picks

Top 10 Cat Eye Gel Nail Polish Colors for a Mesmerizing Manicure

by NailLab Makartt on Jul 23 2024
Cat eye gel nail polish has become a popular choice for nail enthusiasts and professionals alike. The magnetic properties of this unique gel polish create a captivating, multidimensional effect that mimics the mesmerizing gaze of a cat's eye. Makartt offers a stunning collection of cat eye gel nail polishes, perfect for achieving this look. In this blog, we’ll explore the top 10 colors from Makartt's cat eye gel nail polish collection that will leave your nails looking absolutely enchanting. 1. Makartt Galaxy Cat Eye Gel Polish – Black Hole The Black Hole cat eye gel polish is a deep, mysterious black with shimmering silver highlights. This polish is perfect for those who love a classic, elegant look with a twist. The magnetic effect creates a stunning, galaxy-like appearance that is both sophisticated and eye-catching. Why You’ll Love It: Creates a dramatic, high-contrast effect Perfect for evening events and formal occasions Easy to apply and long-lasting 2. Makartt Galaxy Cat Eye Gel Polish – Nebula The Nebula cat eye gel polish features a rich, cosmic purple with hints of blue and pink. This color is ideal for those who want a bold and vibrant manicure that stands out. The magnetic effect adds depth and dimension, making your nails look like they’re straight out of a galaxy far, far away. Why You’ll Love It: Vibrant and bold color Perfect for making a statement Long-lasting and chip-resistant 3. Makartt Galaxy Cat Eye Gel Polish – Milky Way The Milky Way cat eye gel polish is a stunning blend of silver and blue, creating a frosty, ethereal look. This polish is perfect for winter or any time you want a cool, sophisticated manicure. The magnetic effect gives it a beautiful, icy finish that is truly mesmerizing. Why You’ll Love It: Cool and sophisticated color Perfect for winter-themed nail art Durable and easy to apply 4. Makartt Galaxy Cat Eye Gel Polish – Supernova The Supernova cat eye gel polish is a fiery red with golden undertones. This polish is perfect for those who want a bold, attention-grabbing manicure. The magnetic effect adds a dynamic, flame-like appearance that is sure to turn heads. Why You’ll Love It: Bold and fiery color Great for making a statement Long-lasting and easy to apply 5. Makartt Galaxy Cat Eye Gel Polish – Stardust The Stardust cat eye gel polish is a soft, romantic pink with subtle silver highlights. This polish is perfect for those who want a delicate, feminine look with a touch of magic. The magnetic effect adds a beautiful, twinkling finish that is perfect for any occasion. Why You’ll Love It: Soft and romantic color Perfect for everyday wear Easy to apply and durable 6. Makartt Galaxy Cat Eye Gel Polish – Comet The Comet cat eye gel polish features a vibrant blue with shimmering silver undertones. This polish is perfect for those who love bold, striking colors. The magnetic effect creates a stunning, comet-like appearance that is both dynamic and eye-catching. Why You’ll Love It: Bold and vibrant color Perfect for summer and beach-themed nail art Long-lasting and chip-resistant 7. Makartt Galaxy Cat Eye Gel Polish – Meteor Shower The Meteor Shower cat eye gel polish is a dazzling gold with hints of green. This polish is perfect for those who want a glamorous, luxurious look. The magnetic effect adds a beautiful, multidimensional finish that is perfect for special occasions and celebrations. Why You’ll Love It: Glamorous and luxurious color Perfect for special occasions Durable and easy to apply 8. Makartt Galaxy Cat Eye Gel Polish – Aurora The Aurora cat eye gel polish features a stunning blend of green and blue, creating a mesmerizing, aurora-like effect. This polish is perfect for those who love unique, nature-inspired colors. The magnetic effect adds depth and dimension, making your nails look truly magical. Why You’ll Love It: Unique and nature-inspired color Perfect for creative nail art Long-lasting and chip-resistant 9. Makartt Galaxy Cat Eye Gel Polish – Twilight The Twilight cat eye gel polish is a deep, enchanting blue with subtle silver highlights. This polish is perfect for those who want a sophisticated, evening look. The magnetic effect adds a beautiful, starry finish that is perfect for any night out. Why You’ll Love It: Sophisticated and enchanting color Perfect for evening events Easy to apply and durable 10. Makartt Galaxy Cat Eye Gel Polish – Eclipse The Eclipse cat eye gel polish is a rich, dark purple with hints of gold. This polish is perfect for those who want a dramatic, elegant look. The magnetic effect adds a stunning, eclipse-like appearance that is sure to impress. Why You’ll Love It: Dramatic and elegant color Perfect for formal occasions Long-lasting and easy to apply How to Apply Cat Eye Gel Nail Polish To achieve the mesmerizing cat eye effect, follow these steps: Prepare Your Nails: Start by filing and buffing your nails. Apply a base coat and cure it under a UV/LED lamp. Apply the Gel Polish: Apply a thin layer of your chosen cat eye gel polish and cure it under the lamp. Create the Cat Eye Effect: Apply a second layer of the gel polish. Before curing, hold a magnetic stick close to the surface of the nail to create the desired pattern. Cure the polish under the lamp. Finish with Top Coat: Apply a top coat and cure it under the lamp to seal the design and add shine. Makartt's cat eye gel nail polishes offer a range of stunning colors that can transform your nails into a mesmerizing work of art. Whether you prefer bold and vibrant or soft and romantic, there’s a shade for every style and occasion. By choosing the right color and following the proper application techniques, you can achieve a professional-quality manicure that will leave everyone in awe. For more information and to explore the full range of Makartt's cat eye gel nail polishes, visit the Makartt Cat Eye Gel Nail Polish Collection.

Curated for You